
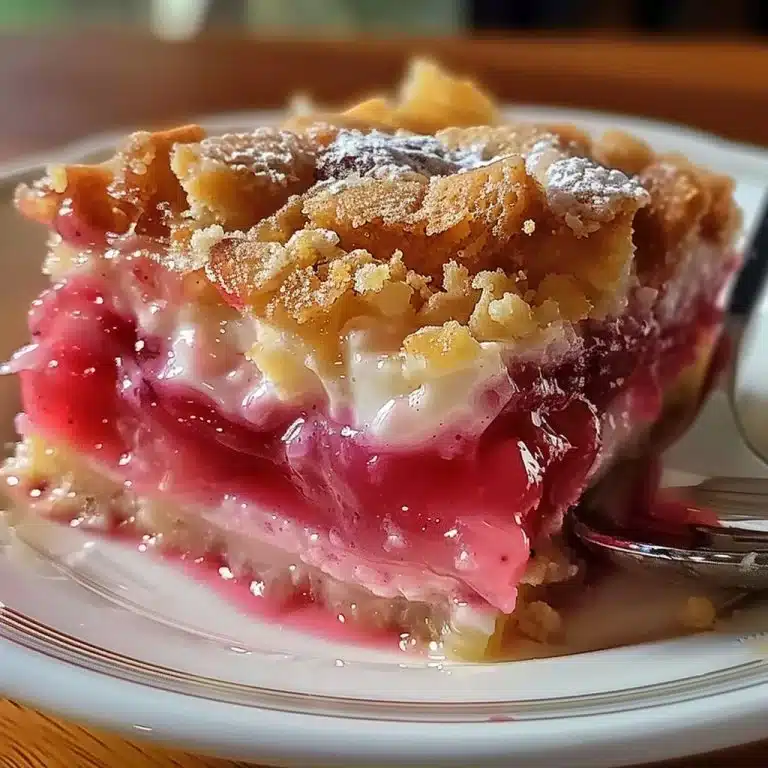
Are you ready to indulge in a delightful treat? The King’s Hawaiian Cheesecake Danish combines the soft, sweet flavor of King’s Hawaiian Rolls with a creamy cheesecake filling for a dessert that’s simply irresistible. Perfect for brunch, gatherings, or even a cozy night at home, this dish is as beautiful as it is tasty. Imagine the warm aroma escaping the oven and the charming golden-brown color of the rolls, all topped off with a sweet glaze.
As you dive into this recipe, prepare yourself for a multi-sensory experience. The warm bread, the rich cream cheese, and the sweet glaze meld together to create a flavor combination that’s simply divine. This article will guide you step-by-step through making your own King’s Hawaiian Cheesecake Danish, covering everything from ingredients to serving suggestions. Get ready to impress your friends and family with this treat that’s just too delicious to resist!
Why You’ll Love This Recipe
- Fresh Ingredients: Each component offers wholesome, quality flavor.
- Ease of Preparation: Simple and straightforward, perfect for all skill levels.
- Nutrition: A good balance of sweetness and creamy goodness, making it a delightful treat.
- Versatility: Great for breakfast, dessert, or snack time!
- Presentation: The beautiful golden rolls make for an eye-catching display.
You’ll love how easy and delicious this recipe is!
Preparation and Cooking Time
- Total time: 50 minutes
- Preparation time: 15 minutes
- Cooking time: 35 minutes
(Note that times may vary.)
Ingredients You’ll Need
Start by selecting the right 12 King’s Hawaiian Rolls, 8 oz Cream Cheese (softened), 1/4 cup Granulated Sugar, 1 tsp Vanilla Extract, 1 cup Powdered Sugar, 2 tbsp Milk, and an additional 1 tsp Vanilla Extract.
King’s Hawaiian Rolls
King’s Hawaiian Rolls are known for their soft, sweet texture. You’ll want to use them fresh for the best flavor. Cut each roll in half and arrange them in a baking dish, ensuring they fit snugly together.
If you’re looking for an alternative, you could use any soft dinner rolls, but the sweetness of King’s Hawaiian really elevates the dish.
Tip: Avoid stale rolls as they won’t provide the ideal texture.
Cream Cheese
Cream cheese gives the cheesecake filling its rich and creamy texture. Soften it before mixing for smoother results.
If you’re looking for an alternative, you can use mascarpone, though the flavor may be slightly different.
Tip: Overmixing can lead to a runny filling, so mix just until combined.
Granulated Sugar
Granulated sugar adds sweetness to the cream cheese. It also helps to create a balanced flavor.
If you’re looking for an alternative, feel free to use coconut sugar for a richer flavor.
Tip: Too much sugar can make it overly sweet, so adjust to your taste.
Vanilla Extract
Vanilla extract enhances flavor in desserts and pastries, giving a delicious aroma.
If you’re looking for an alternative, consider using almond extract for a different, nutty flavor.
Tip: Always add vanilla to taste; it can make a big difference in the overall flavor.
Powdered Sugar
Powdered sugar is used for the final glaze, creating a sweet and glossy finish.
If you’re looking for an alternative, try honey or maple syrup for drizzling, but be aware of texture changes.
Tip: Sift the powdered sugar for a fruitier glaze without lumps.
Milk
Milk helps to thin the glaze for the perfect consistency.
If you’re looking for an alternative, you can use almond milk or coconut milk for a dairy-free option.
Tip: Adjust the milk quantity to achieve your desired glaze thickness.
Step-by-Step Instructions
This one-pan recipe ensures an easy clean-up while delivering a delicious dessert.
Step 1: Preheat the Oven
Preheat your oven to 350°F (175°C). This step is crucial for ensuring even cooking.
Step 2: Prepare the Rolls
Slice the King’s Hawaiian Rolls in half and place them in a greased baking dish. Pack them snugly together for best results.
Step 3: Mix the Cream Cheese Filling
In a medium bowl, beat the softened cream cheese, granulated sugar, and 1 tsp vanilla extract until smooth. This will yield the creamy filling you desire.
Step 4: Spread the Filling
Carefully spread the cream cheese mixture over the cut sides of the rolls. Ensure even coverage for the best flavor.
Step 5: Bake
Place the dish in the preheated oven and bake for about 25-30 minutes until the rolls are golden brown and the filling is set. Look for a lightly browned top as a visual cue for doneness.
Step 6: Make the Glaze
While the rolls bake, mix the powdered sugar, milk, and remaining vanilla extract in a bowl. Adjust the consistency as desired.
Step 7: Drizzle and Serve
Once the Danish is done, let it cool briefly. Drizzle the glaze over the top before serving. You’ll want to serve it warm for the best experience!
How to Serve
- Presentation: Serve the Danish warm on a large platter for a stunning display.
- Accompaniments: Pair with fresh berries or a scoop of ice cream for added delight.
- Portions: Cut the Danish into squares to serve individual portions.
- Beverage Pairing: Enjoy with coffee, tea, or a refreshing juice.
This delightful treat is perfect both for family gatherings and casual snacking!
Additional Tips
- Enhance flavor with citrus zest to brighten up the filling.
- Customize by adding fruit or chocolate chips to the cream cheese mixture.
- Serve with a dollop of whipped cream for an indulgent touch.
Recipe Variations
- Fruit-Filled: Add fresh strawberries or blueberries to the cream cheese mix for a fruity twist.
- Chocolate Delight: Mix chocolate chips into the filling for a rich chocolate flavor.
- Nutty Surprise: Fold in chopped nuts like pecans or walnuts for added crunch and texture.
Freezing and Storage
- Storage: Keep in an airtight container in the refrigerator for up to 3 days.
- Freezing: For best results, freeze before baking. Wrap tightly and store for up to 2 months. Thaw before baking.
Special Equipment
- Baking dish
- Mixing bowls
- Hand mixer or stand mixer
- Measuring cups and spoons
- Spatula
- Plastic wrap or foil for covering
FAQ’s
1. Can I use frozen rolls?
Yes, you can use frozen rolls, but make sure to thaw and let them rise a bit before baking for best results.
2. Is this recipe suitable for special diets?
The recipe is not vegetarian or gluten-free. However, substitutions can be made for most dietary restrictions.
3. Can I prepare this ahead of time?
Absolutely! You can assemble the rolls and filling a day ahead and bake them when ready to serve.
4. How can I customize the recipe?
Feel free to add flavors like lemon zest or mix in your favorite fruits to the cream cheese filling.
5. Can I bake this in a different method?
You can use an air fryer for a quicker bake, just adjust the temperature and time according to your air fryer’s settings.
Conclusion
The King’s Hawaiian Cheesecake Danish is not just a treat; it’s an experience of warmth, sweetness, and gorgeous flavors. With its inviting appearance, it’s perfect for any occasion, from family brunches to dessert parties. Healthy ingredients combined with a heavenly taste make this dessert a must-try. Don’t hold back; get in the kitchen and create this delightful dish today!


King’s Hawaiian Cheesecake Danish
Ingredients
For the Danish
- 12 pieces King’s Hawaiian Rolls Use fresh rolls for the best flavor.
- 8 oz Cream Cheese Softened for easy mixing.
- 1/4 cup Granulated Sugar Adjust sweetness to taste.
- 1 tsp Vanilla Extract Enhances flavor; can substitute with almond extract.
For the Glaze
- 1 cup Powdered Sugar Sift for a smoother glaze.
- 2 tbsp Milk Adjust quantity for desired glaze thickness.
- 1 tsp Vanilla Extract Use the remaining from above.
Instructions
Preparation
- Preheat your oven to 350°F (175°C).
- Slice the King’s Hawaiian Rolls in half and place them in a greased baking dish, packing them snugly together.
- In a medium bowl, beat the softened cream cheese, granulated sugar, and 1 tsp vanilla extract until smooth.
- Spread the cream cheese mixture evenly over the cut sides of the rolls.
Baking
- Bake in the preheated oven for about 25-30 minutes until golden brown and the filling is set.
- While baking, prepare the glaze by mixing powdered sugar, milk, and the remaining vanilla extract.
- Once done, let the Danish cool briefly and drizzle the glaze over the top before serving.


Did you make this recipe?
Share a photo and tag us, we can’t wait to see what you’ve made!