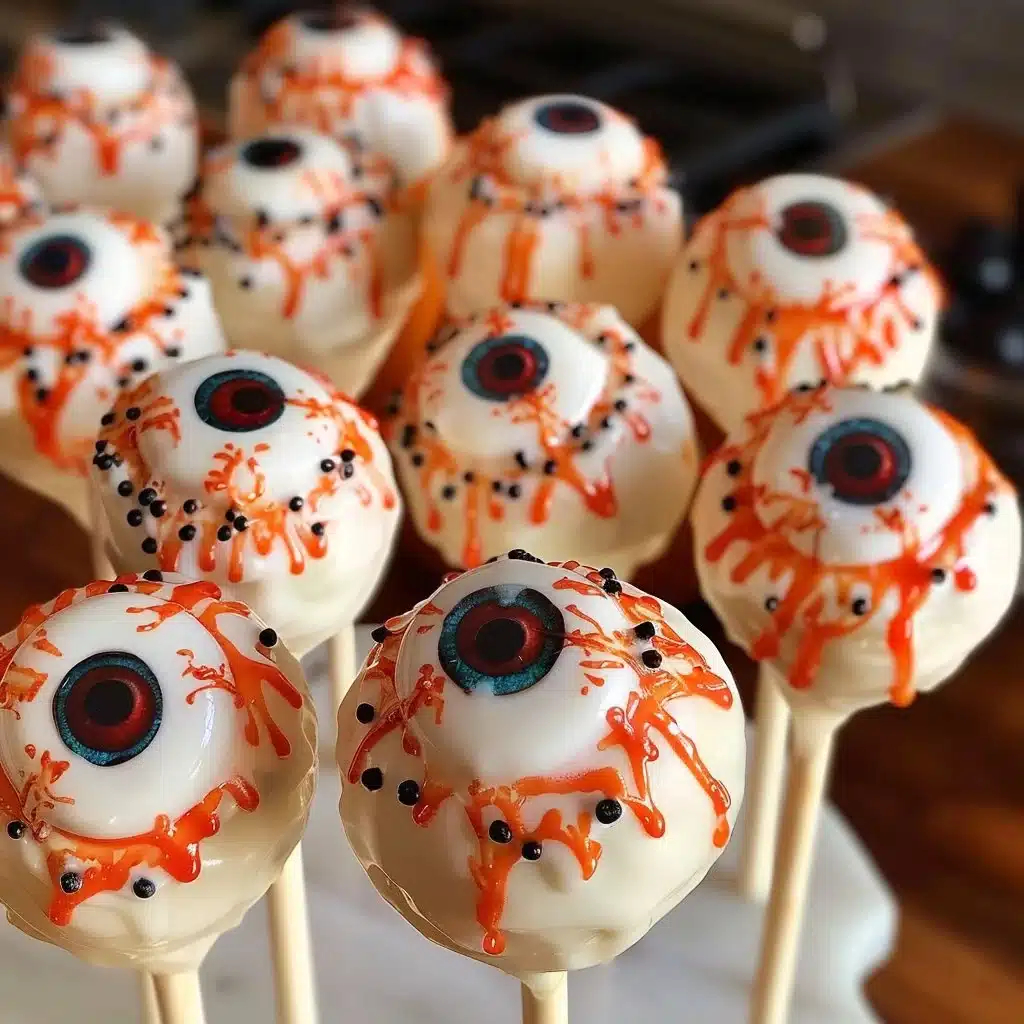
Get ready for a spook-tacular treat this Halloween with these delicious Halloween Eyeball Cake Pops! These cake pops, shaped like creepy eyeballs, are covered in smooth white chocolate that melts in your mouth. With colorful irises and red veins, they’re not only tasty but also delightfully creepy, making them the perfect addition to any Halloween party or gathering. Your guests will be both amazed and amused by their spooky appearance!
As you take a bite, delight in the combination of sweet vanilla cake and rich chocolate. With every pop, you’ll experience a fun mix of flavors that bring joy to the senses. In this article, you’ll find everything you need to make these frighteningly fun treats. From ingredients to step-by-step instructions, let’s dive into making Halloween memorable with these yummy eyeball cake pops!
Why You’ll Love This Recipe
- Fresh Ingredients: You use simple, fresh ingredients that you can easily find at the store.
- Ease of Preparation: The recipe is straightforward, making it suitable for bakers of any skill level.
- Nutrition: Enjoy the treat without feeling guilty; it’s made with manageable portions.
- Versatility: You can customize the flavor and decoration to match any spooky theme.
- Presentation: They look impressive and are sure to be a hit at any Halloween event.
You’ll love whipping up these delightful treats!
Preparation and Cooking Time
- Total time: 2 hours
- Preparation time: 1 hour
- Cooking time: 30 minutes
Note that times may vary.
Ingredients You’ll Need
- 1 box (15.25 oz) vanilla cake mix
- Eggs, oil, and water as directed on the box
- 1/2 cup vanilla frosting
- 12 oz white candy melts
- 1 tsp coconut oil, optional
- Colorful irises (food decorations)
- Red food coloring (for veins)
Step-by-Step Instructions
- Bake the Cake: Prepare the vanilla cake mix according to the package instructions. Bake in a 9×13 inch pan. Cool completely.
- Crumb the Cake: Once cooled, crumble the cake into a large bowl. Mix in the vanilla frosting until well combined.
- Shape the Pops: Roll the mixture into small balls, about 1 inch in diameter. Place them on a baking sheet lined with parchment paper. Freeze for 30 minutes.
- Melt the Chocolate: In a microwave, melt the white candy melts and coconut oil until smooth, stirring every 30 seconds.
- Dip the Cake Pops: Insert a fork into each cake pop and dip into the melted chocolate. Gently tap to remove excess chocolate.
- Decorate: Place the dipped pops back on the parchment paper. While the chocolate is still wet, add colorful irises and use red food coloring to create veins.
- Set and Serve: Allow the cake pops to harden for at least 15 minutes before serving.
How to Serve
- Presentation: Display the cake pops in a spooky jar or a decorated foam block to stand out.
- Accompaniments: Serve with a side of chocolate sauce for dipping.
- Portions: Offer one or two cake pops per guest to keep desserts manageable.
- Beverage Pairing: Pair with apple cider or hot chocolate for a festive touch.
The fun doesn’t stop here—enjoying these cake pops will be a memorable experience!
Additional Tips
- Enhance flavor by adding a hint of almond extract to the frosting.
- Customize colors and decorations to fit your own Halloween theme.
- Serve on a platter with spooky decorations to boost the festive mood.
Recipe Variations
- Chocolate Cake Pops: Use a chocolate cake mix instead of vanilla for a richer flavor.
- Red Velvet Eyeballs: Swap in red velvet cake mix for a vibrant twist.
- Fun Sprinkles: Decorate with Halloween-themed sprinkles for added texture and appeal.
Freezing and Storage
- Storage: Keep cake pops in an airtight container in the refrigerator for up to 5 days.
- Freezing: For best freshness, freeze wrapped cake pops for up to 2 months. Thaw in the fridge before serving.
Special Equipment
- Baking pan
- Parchment paper
- Microwave-safe bowl
- Forks
- Cooling rack
- Airtight container
FAQ’s
- Can I use frozen ingredients? Yes, you can use previously frozen cake mix. Just make sure to defrost it properly before using.
- Is this recipe suitable for dietary restrictions? The recipe can be adjusted for gluten-free or dairy-free diets with suitable substitutes.
- Can I make these cake pops ahead of time? Absolutely! They can be prepared and stored in advance, making them a great make-ahead treat.
- How can I customize the decorations? You can use different colors and shapes of edible decorations to create your ideal eyeball design.
- Are there alternative cooking methods? You can bake the cake in different pans or sizes, but the method remains the same.
Conclusion
These Halloween Eyeball Cake Pops are not only fun to make but also delicious to eat! With their creamy center and spooky decor, they are perfect for Halloween gatherings, parties, or as a delightful treat for friends and family. Get your ingredients ready and unleash your creativity in the kitchen; you’ll be thrilled with the results. Happy baking!


Halloween Eyeball Cake Pops
Ingredients
For the cake pops
- 1 box vanilla cake mix (15.25 oz)
- as directed Eggs, oil, and water As per the cake mix package directions
- 1/2 cup vanilla frosting
- 12 oz white candy melts
- 1 tsp coconut oil Optional
- to taste colorful irises (food decorations)
- to taste red food coloring For veins
Instructions
Preparation
- Prepare the vanilla cake mix according to the package instructions. Bake in a 9x13 inch pan. Cool completely.
- Once cooled, crumble the cake into a large bowl. Mix in the vanilla frosting until well combined.
- Roll the mixture into small balls, about 1 inch in diameter. Place them on a baking sheet lined with parchment paper. Freeze for 30 minutes.
Decorating
- In a microwave, melt the white candy melts and coconut oil until smooth, stirring every 30 seconds.
- Insert a fork into each cake pop and dip into the melted chocolate. Gently tap to remove excess chocolate.
- Place the dipped pops back on the parchment paper. While the chocolate is still wet, add colorful irises and use red food coloring to create veins.
- Allow the cake pops to harden for at least 15 minutes before serving.



Did you make this recipe?
Share a photo and tag us, we can’t wait to see what you’ve made!